> For the complete documentation index, see [llms.txt](https://guides.polyflow.co/llms.txt). Markdown versions of documentation pages are available by appending `.md` to page URLs; this page is available as [Markdown](https://guides.polyflow.co/translation-flows/polyflow-first-use.md).
# Polyflow first use
{% hint style="info" %}
Remember that to start working with Polyflow, you need to have created an account and have our extension installed.
* [Create an account](/getting-started/create-your-account.md)
* [Install our browser extension](/getting-started/install-our-browser-extension.md)
{% endhint %}
### 1. Open your Webflow project
Select the project you want to translate in your Webflow Dashboard
### 2. Publish your project
The first step is to publish your project in Webflow, so we can get all the HTML elements.

### 3. Sync with Polyflow
Bring your impressive webflow project to polyflow by synchronizing pages, symbols and CMS collections.
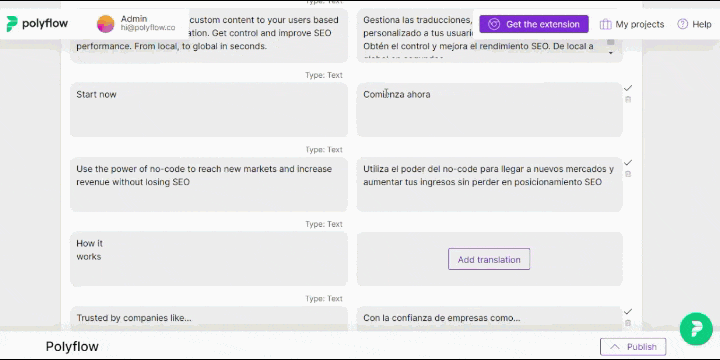
### 4. Translate in Polyflow
Create versions from the languages you need to add, and translate your Webflow project pages.
\
### 5. Publish in Polyflow
Once you have added all the translations you can publish, both on the main domain and on the staging domain which is used to preview how your website looks like.
\

 ### 4. Translate in Polyflow
Create versions from the languages you need to add, and translate your Webflow project pages.
\

### 5. Publish in Polyflow
Once you have added all the translations you can publish, both on the main domain and on the staging domain which is used to preview how your website looks like.
\
### 4. Translate in Polyflow
Create versions from the languages you need to add, and translate your Webflow project pages.
\

### 5. Publish in Polyflow
Once you have added all the translations you can publish, both on the main domain and on the staging domain which is used to preview how your website looks like.
\